Bevel a Curve (Surface)#
Functionality#
This node provides functionality similar to Blender’s standard “bevel curve” feature. More precisely, it extrudes one flat curve (called “profile curve”) along another curve (path). Scale of “profile curve” may vary along the curve, as it is controlled by third curve (called “taper curve”).
It is in general not a trivial task to rotate a 3D object along a vector, because there are always 2 other axes of object and it is not clear where should they be directed to. So, this node supports 3 different algorithms of object rotation calculation. In many simple cases, all these algorithms will give exactly the same result. But in more complex setups, or in some corner cases, results can be very different. So, just try all algorithms and see which one fits you better.
“Frenet” or “Zero-Twist” algorithms give very good results in case when extrusion curve has non-zero curvature in all points. If the extrusion curve has zero curvature points, or, even worse, it has straight segments, these algorithms will either make “flipping” surface, or give an error.
“Householder”, “Tracking” and “Rotation difference” algorithms are “curve-agnostic”, they work independently of curve by itself, depending only on tangent direction. They give “good enough” result (at least, without errors or sudden flips) for all extrusion curves, but may make twisted surfaces in some special cases.
“Track normal” algorithm is supposed to give good results without twisting for all extrusion curves. It will give better results with higher values of “resolution” parameter, but that may be slow.
Note 1: Taper is supposed to be an open Curve, elongated along one of coordinate axes (X, Y or Z). That must be the orientation axis, i.e. the axis perpendicular to the plane of bevel object.
In the most common case, “profile curve” will lay in XY plane, so that orientation axis will be Z.
This node can function in several modes:
Generic surface. In this mode, the node can process arbitrary Curve objects, and will generate a generic Surface object.
NURBS surface by simple algorithm. In this mode, the node can process only NURBS or NURBS-like curves, and will generate a NURBS surface. This algorithm generates a minimal amount of control points; so, the generated surface may follow the path curve only approximately. On the other hand, this is the fastest of NURBS modes of this node.
NURBS surface with refinement. In this mode, the node can process only NURBS or NURBS-like curves, and will generate a NURBS surface. This algorithm first refines taper curve (i.e., adds some number of additional knots in it), and then applies the “simple” algorithm. This algorithm produces more control points, and that allows it to generate a surface which follows the path and taper curves more precisely.
NURBS Gordon surface:
Refine taper curve;
Generate a number of copies of taper curve, bent along the path curve, and rotated around it, according to the profile curve.
Generate a number of copies of profile curve, rotated and placed along the path curve, scaled according to the taper curve.
Use these two series of curves to generate a surface by use of Gordon algorithm.
For smooth curves, Gordon algorithm is supposed to be the most precise of NURBS modes of this node; but it is also the slowest one.
Generator-> NGon
Curves-> Cubic Spline
Note 2: Gordon algorithm does not support use of rational curves as either profile or taper.
Note 3: Gordon algorithm can not produce surfaces with hard edges. If you provide it with profile curve which has hard turns (discontinuities of curve’s derivative), the output will look weird.
With last two modes, this node can generate a surface with large number of control points. It can be wise to use “Remove excessive knots” node to simplify the surface.
Inputs#
This node has the following inputs:
Path. Path curve. This input is mandatory.
Profile. Profile curve. This input is mandatory.
Taper. Taper curve. If this input is not connected, constant taper will be used.
Resolution. Path length calculation resolution. This input is available only when Samples distribution parameter is set to Curve length. The default value is 50.
ProfileCopies. This input is available only when Mode parameter is set to NURBS, and Precision parameter is set to Gordon. Number of copies of profile curve to be generated and distributed along the path curve, in order to build a Gordon surface. The default value is 10.
TaperRefine. This input is available only when Mode parameter is set to NURBS, and Precision parameter is set to Refine or Gordon. Number of additional knots to be inserted in the taper curve. The default value is 20.
TaperCopies. This input is available only when Mode parameter is set to NURBS, and Precision parameter is set to Gordon. Number of copies of the taper curve to be rotated and bent along the path curve, in order to build a Gordon surface. The default value is 10.
Parameters#
This node has the following parameters:
Mode. The following modes are available:
Generic. The node will process arbitrary curves and output a generic Surface object.
NURBS. The node will process NURBS or NURBS-like curves and output a NURBS surface.
The default mode is Generic.
Precision. This parameter is only available when Mode algorithm is set to NURBS. Defines the algorithm to be used to generate control points of the NURBS surface. The available options are: Simple, Refine and Gordon. See Functionality section for description of these algorithms.
Orientation. The axis of “bevel object”, which should be oriented along the path. Default value is Z (which means that bevel object should lay in XY plane).
Algorithm. Rotation calculation algorithm. Available values are:
Householder: calculate rotation by using Householder’s reflection matrix (see Wikipedia article).
Tracking: use the same algorithm as in Blender’s “TrackTo” kinematic constraint. This algorithm gives you a bit more flexibility comparing to other, by allowing to select the Up axis.
Rotation difference: calculate rotation as rotation difference between two vectors.
Frenet: rotate the space according to curve’s Frenet frame.
Zero-Twist: rotate the space according to curve’s “zero-twist” frame.
Track normal: try to maintain constant normal direction by tracking it along the curve.
Default value is Householder.
Up axis. Axis of donor object that should point up in result. This parameter is available only when Tracking algorithm is selected. Value of this parameter must differ from Orientation parameter, otherwise you will get an error. Default value is X.
Samples distribution. This defines how the scaling of the space along the path curve is to be calculated. The available options are:
Curve parameter. Scale the space proportional to curve’s T parameter.
Curve length. Scale the space proportional to curve’s length. This usually gives more natural results, but takes more time to compute.
The default option is Curve parameter.
Outputs#
This node has the following output:
Surface. The generated Surface object.
Examples of Usage#
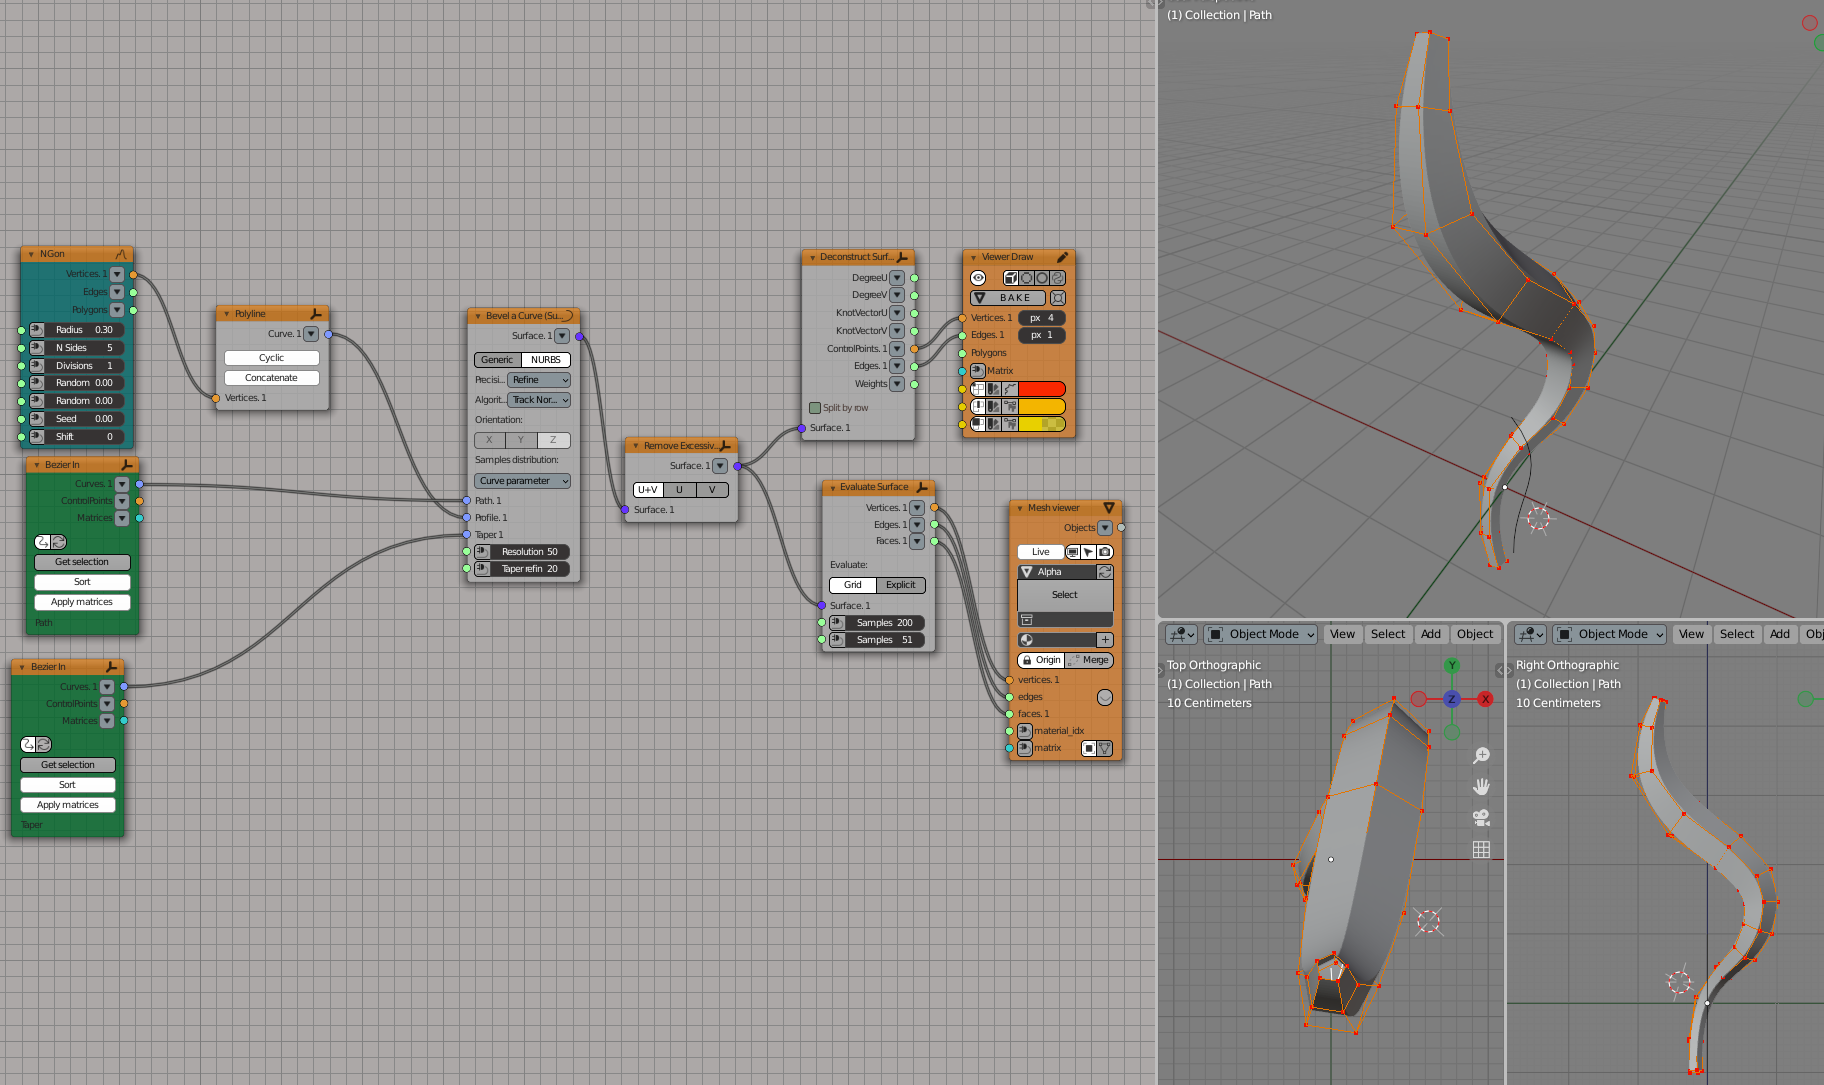
Example 1:

Generator-> NGon
Curves->Curve Primitives-> Polyline
Surfaces->Surface NURBS-> Remove Excessive Knots (NURBS Surface)
Surfaces->Surface NURBS-> Deconstruct Surface
Surfaces-> Evaluate Surface
Viz-> Viewer Draw
Viz-> Mesh Viewer
Scene-> Bezier Input
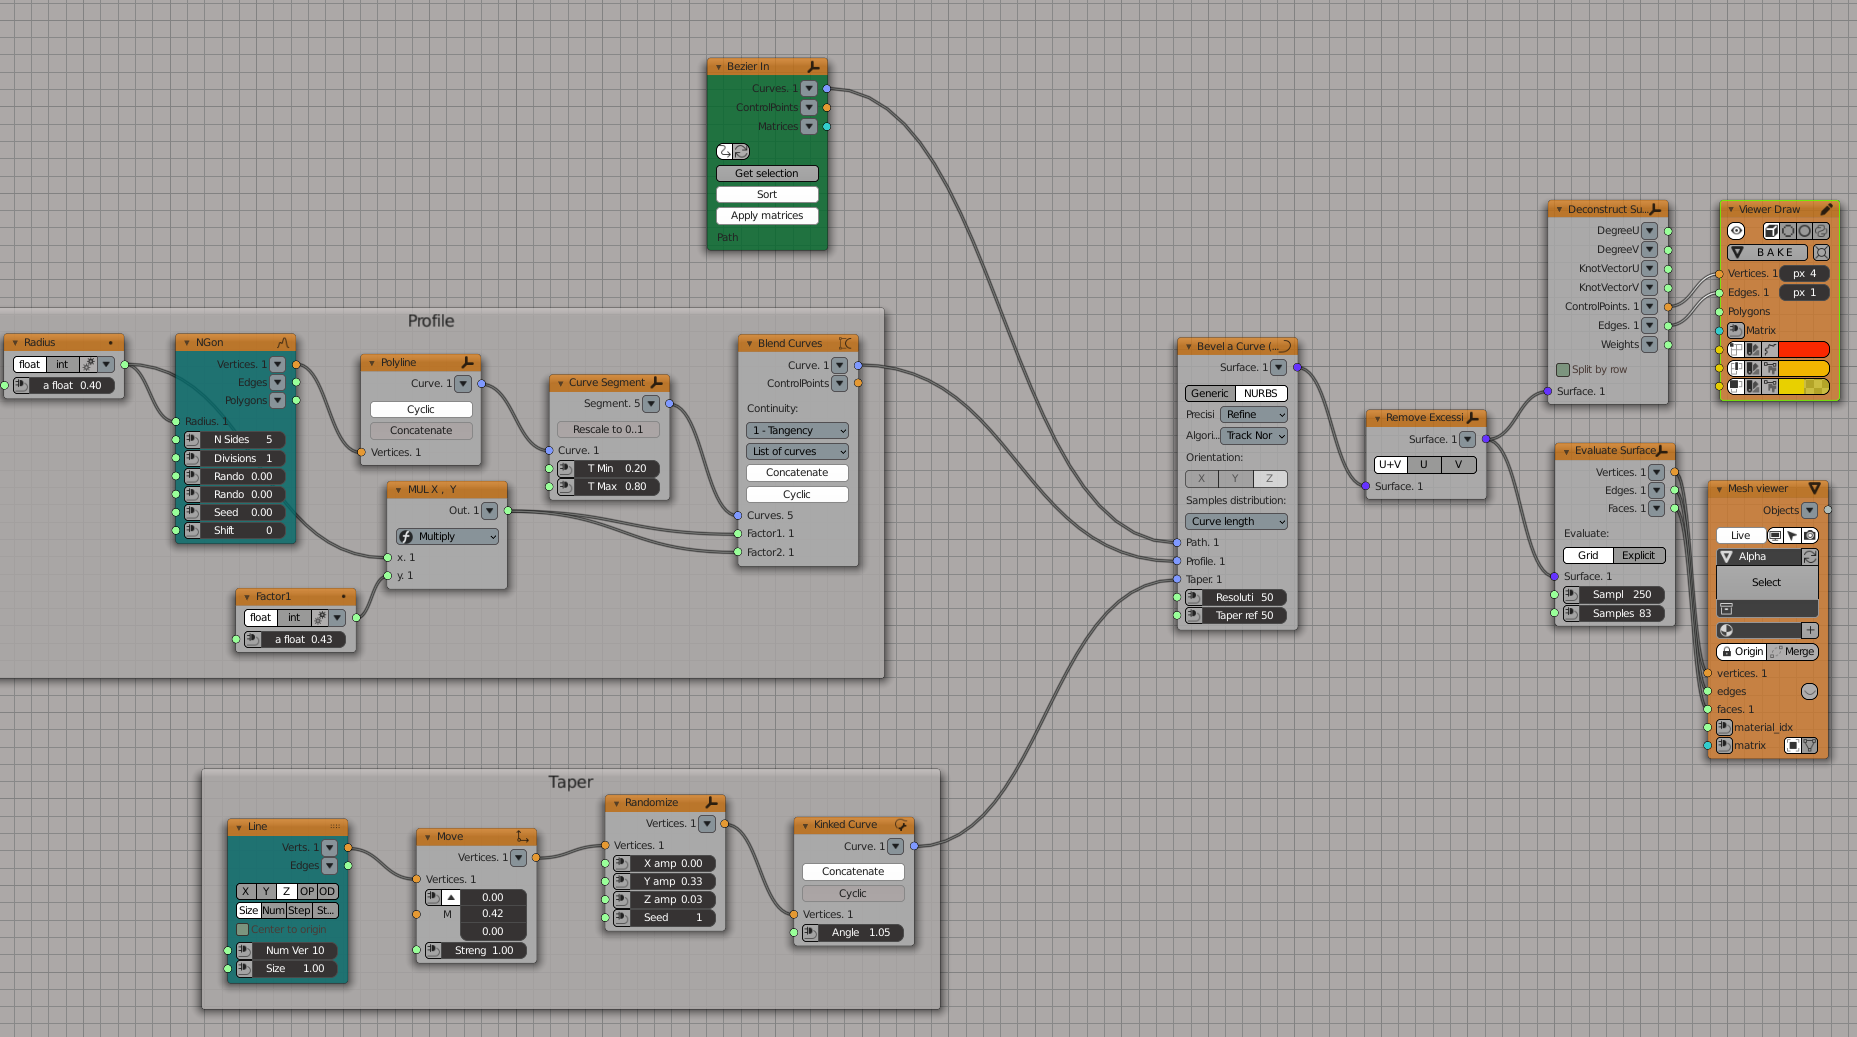
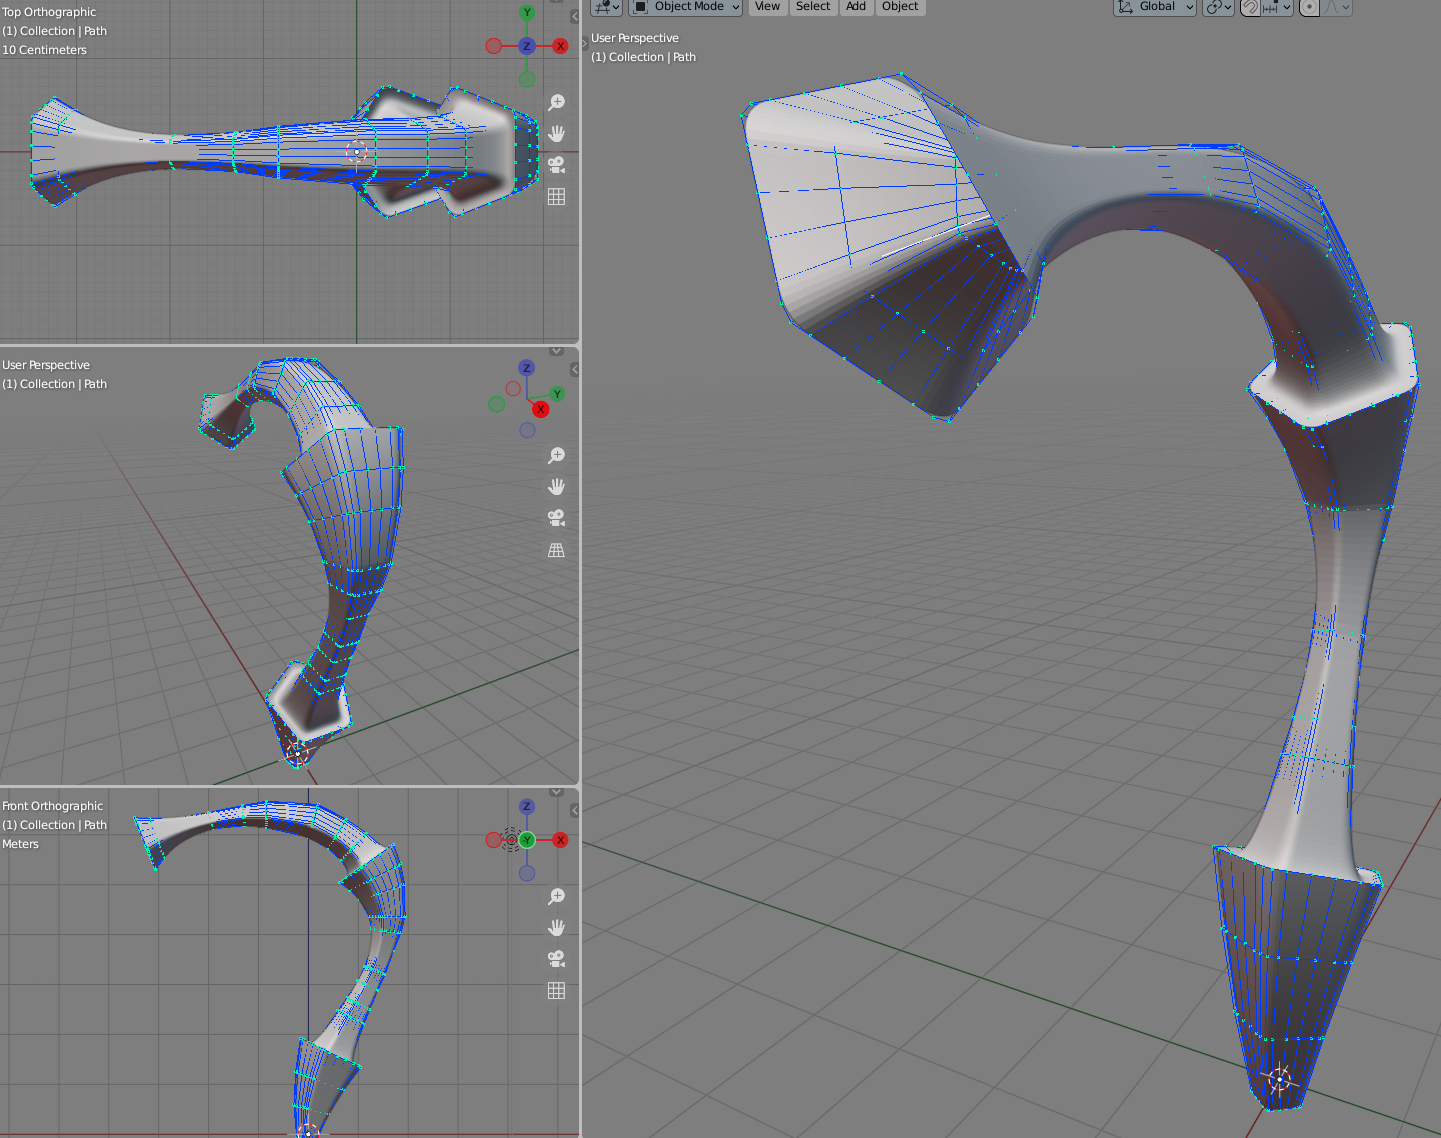
Example 2:

Generator-> Line
Generator-> NGon
Curves->Curve Primitives-> Polyline
Curves->Curve Primitives-> Kinked Curve
Curves-> Curve Segment
Curves-> Blend Curves
Surfaces->Surface NURBS-> Remove Excessive Knots (NURBS Surface)
Surfaces->Surface NURBS-> Deconstruct Surface
Transform-> Move
Transform-> Randomize
Radius: Number-> A Number
MUL X,Y: Number-> Scalar Math
Viz-> Viewer Draw
Viz-> Mesh Viewer
Scene-> Bezier Input
